Action widgets
This section describes action widgets
Action widgets are a group of widgets that can modify Model settings. The widget function is defined by means of an embedded Python script.
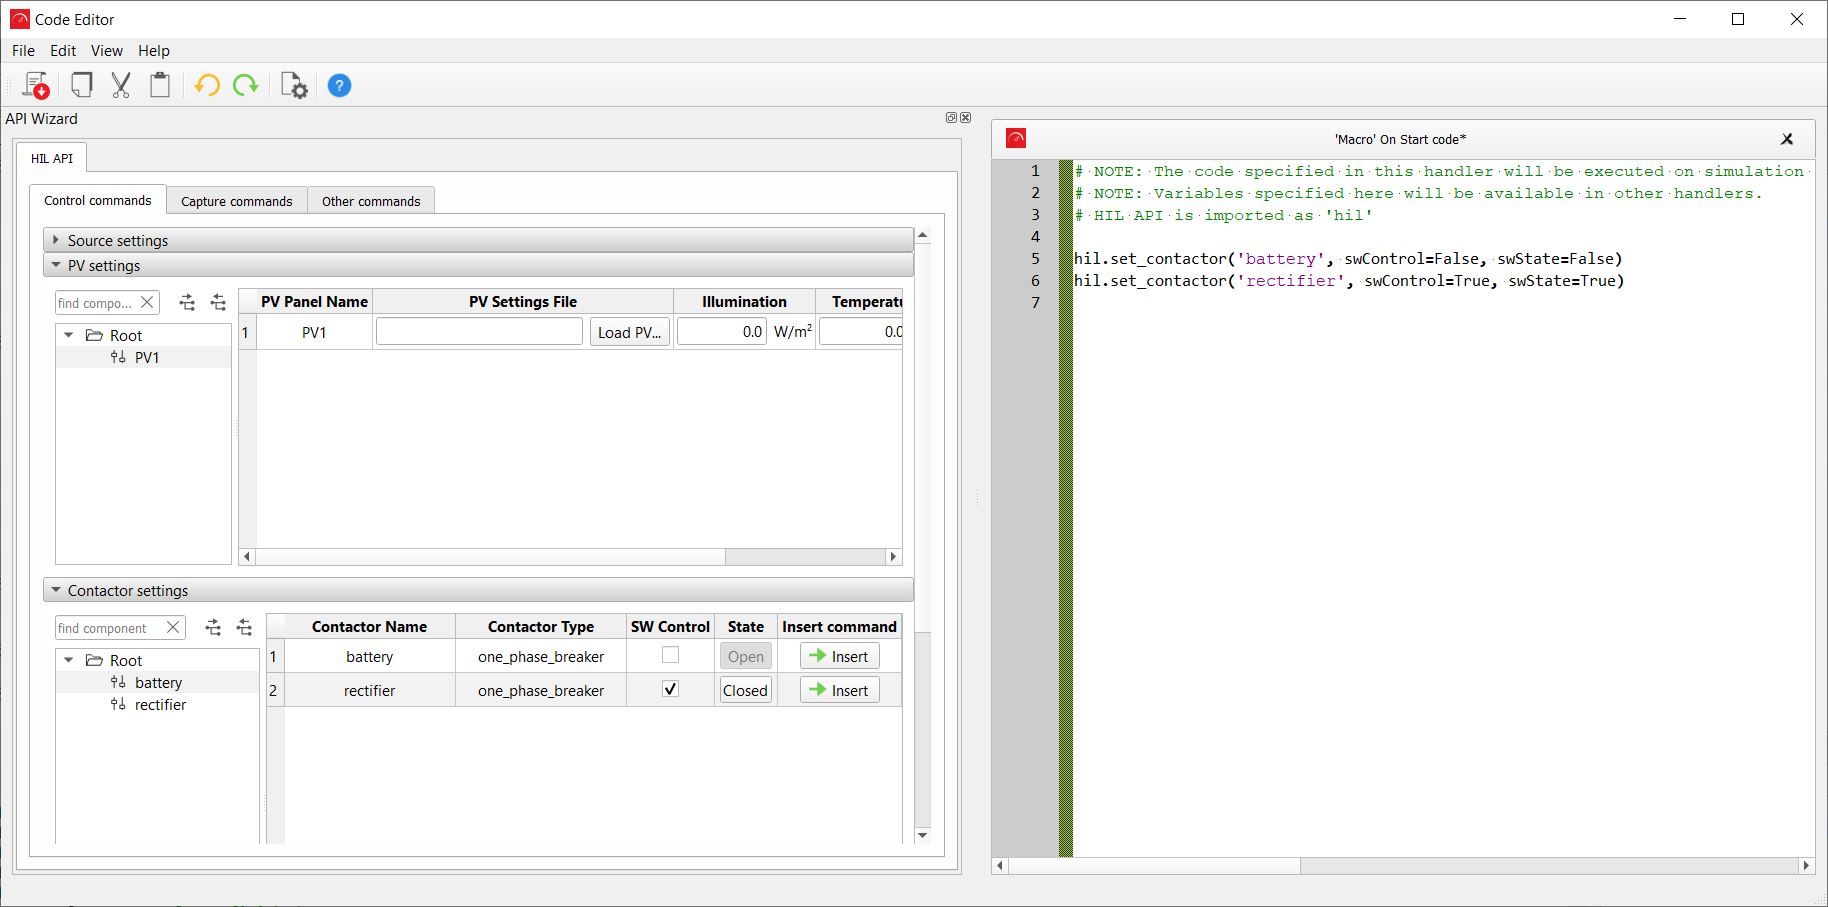
The easiest way to start writing scripts is to use API Wizard which is initially positioned on the left side of the Code Editor window (Figure 1). To open Code Editor and therefore to use API Wizard, right-click any Macro widget and chose Edit macro code from the context menu.
In the Wizard, actions are defined graphically in a way analogous with the standard Model Settings and with a click of button they are converted to appropriate API function call(s).
There are a few widgets available in this group:
- Button - every click on a button starts the script execution.
- Text box - macro execution is started by entering a new value into the text box. The entered value can be used as an input variable in the macro script.
- Combo box - macro execution is started when a new combo box value is selected. The selected value can be used in the macro script and the user can also specify which values are available in the combo box.
- Check box - macro execution is started by checking or un-checking a small check box field. The check box state can be used as an input variable in the macro script.
- Slider and Knob - macro execution is started when the slider is moved. The slider/knob value is available in the macro script as an input variable.
- Macro – this is a special Action widget that has four event handlers whose code
is executed in four different ways:
- On Start - the code specified in this handler will be executed at the simulation start after the Panel initialization script is executed.
- On Click - the code specified in this handler will be executed on a button click in the similar way as in the Button action widget.
- On Timer - the code specified in this handler will be executed on a timer event of the specified HIL SCADA Time slot.
- On Stop - the code specified in this handler will be executed after simulation is stopped.
Note: At least one handler must be active.Note: Variables specified inside On Start handler will be available in other two handlers.
All other actions widgets can have three special handlers similar to Macro widget:
- On Start handler - the code specified in this handler will be executed on
simulation start after Panel initialization script is executed.Note: On Start handler can use the same code specified in Basic settings->Macro code properties section. You can change which code will be used with Code source combo box.
- On Timer handler - the code specified in this handler will be executed periodically each 1000 ms.
- On Stop - the code specified in this handler will be executed after simulation is
stopped.Note: Additional handlers allow user also to set initial widget value (On Start handler) , to change widget value periodically (On Timer handler) or to reset widget value (On Stop handler). Value is changed by setting widgetValue variable inside handler script.
