Library Explorer
Description of the Library Explorer panel in Schematic Editor.
The Library Explorer panel contains components (in the form of a component tree view) which can be inserted in a schematic diagram. Schematic components are grouped into categories. To make finding components easier, a Search field is provided, accompanied with tree functions which allow you to collapse, expand, and sort category names. For detailed information on the components available in Typhoon HIL's Schematic Editor Library, please refer to the Schematic Editor Component Libraries section.
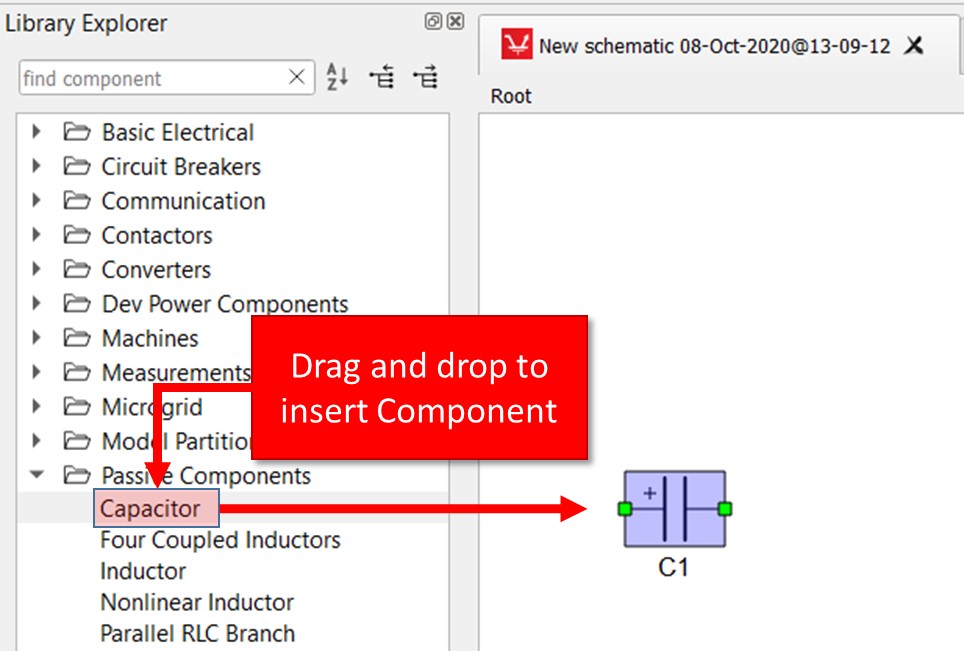
To add a new component to a schematic diagram, press and hold the left mouse button on the desired component name in the component tree, drag it to the schematic diagram (scene) and release the left mouse button over the desired position to place the component (Figure 1). This is actually a drag-and-drop operation. The action of adding a component can be cancelled by pressing the Esc keyboard key. Alternatively, you can add a new component to a schematic diagram by using the Quick insert dialog.
The Typhoon HIL toolchain supports model simulation in two different ways: HIL/VHIL (real-time simulation context) and TyphoonSim (offline simulation context).
Due to the nature of real-time simulation and offline simulation, not all components and features can be available in both contexts at all times. The simulation perspectives concept lets you distinguish which components are supported and which components are not supported in a particular simulation context. More information about available simulation perspectives and visual notifications about usage constraints for specific components and features can be found in Simulation context definitions document.
To open the Library Info dialog (Figure 3), which shows more information about a component library, right-click on the component library inside the Library Explorer dock and choose the Library Info action (Figure 2).


In order to open the component library where the selected library component is specified, right-click on the Library Component inside the Library Explorer dock and choose the Open Component Library action (Figure 4).

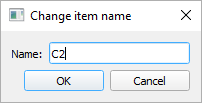
Double clicking on a component label (in the schematic diagram) opens a dialog for changing the name of the component (Figure 5). Also, the name can be set to be hidden (Figure 6).