Creating wires and wire nodes (junctions)
This section describes creating wires and wire nodes (junctions)
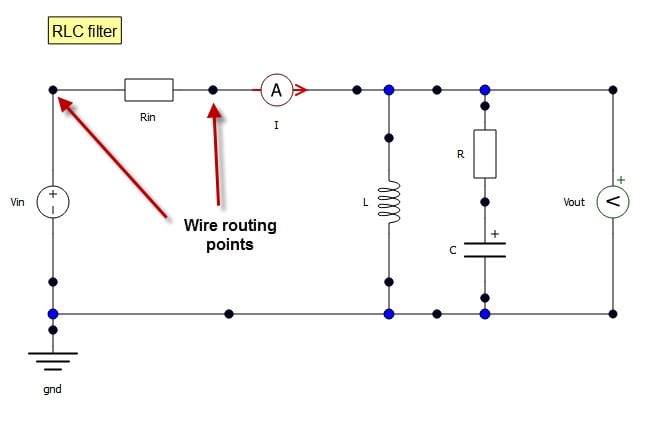
To create a wire left-click on the component terminal (or left-click on a wire junction while holding the Ctrl keyboard key) and then click on the destination component terminal, junction (wire node) or wire. A wire will be auto-routed between the start and the end terminal, but you can make explicit wire routing points by left-clicking buttons on the drawing canvas while creating a wire. The router will honor these wire routing points: in other words, a wire will be going through this points regardless what the router does with other parts of the wire
To display aforementioned explicit wire routing points press the Shift keyboard button (Figure 1).
To delete a wire routing point, press Shift to display it and then left-click it.
To delete all wire routing points from all wires in a diagram click the Remove wire/s routing points action in the Edit menu. To delete wire routing points for a specific wire right-click the wire and select the Remove wire/s routing points action from the context menu. To remove routing points from several wires, right-click the multiple selection and choose the same action.
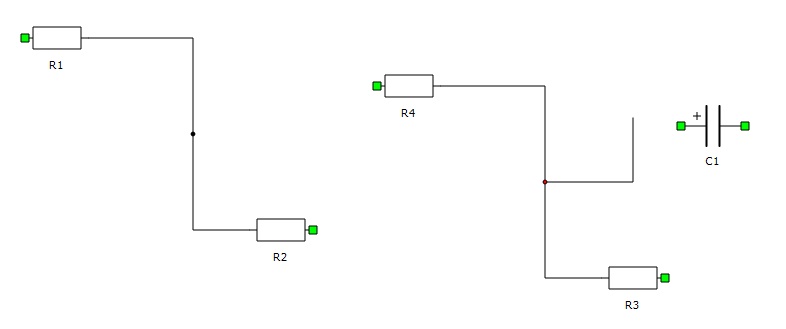
Wire nodes or junctions (displayed as black circles on a wire) are created when one wire is connected to another wire. Wire nodes can also be created by left-clicking the target wire while holding the Ctrl key (Figure 2). This wire node can be used as an ending or starting point for a new wire: just hold the Ctrl key, select a node by left-clicking and start drawing the wire.