C function
Description of the C function component in Schematic Editor, which enables importing functions from the C programing language.
The C function component allows you to implement a component with an arbitrary function using the C programming language.
Like any other Signal Processing component, C function consists of inputs, outputs and functions that define the functionality of the block. This section explains in detail the options which are available for configuring the C function component in each of its tabs and sub-tabs.
In addition, C function allows you to add additional library files (.dll, .so, and .a) via the Library import tab and external C/C++ language source files via the Additional sources tab.
General tab
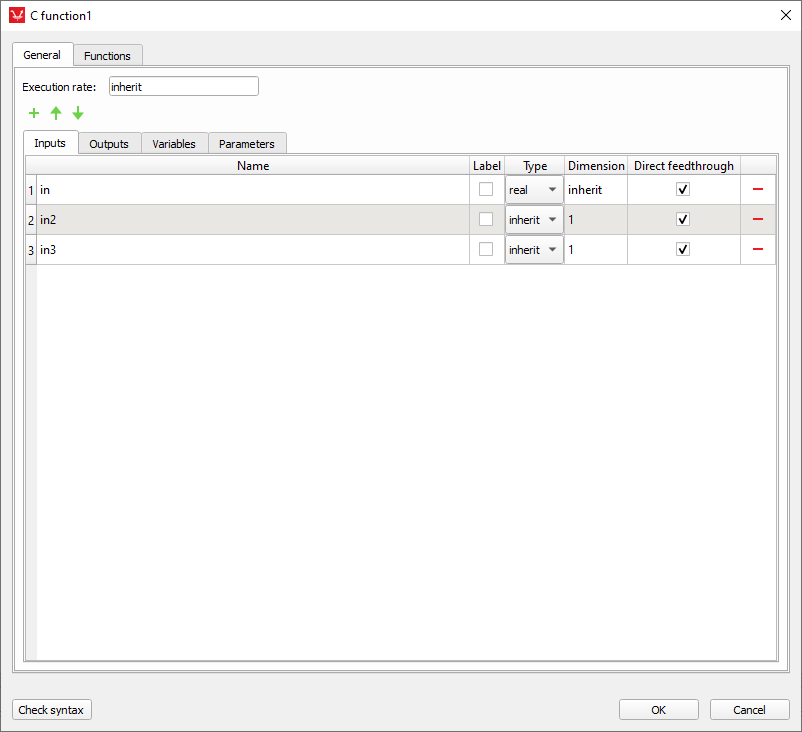
In this tab, you can define the general properties of the C function component, including its name, its execution rate, inputs, outputs, global variables, and parameters. Figure 1 shows the user interface of the General tab.
Inputs and outputs
Input and output terminals are defined inside the Inputs and Outputs tabs, respectively.
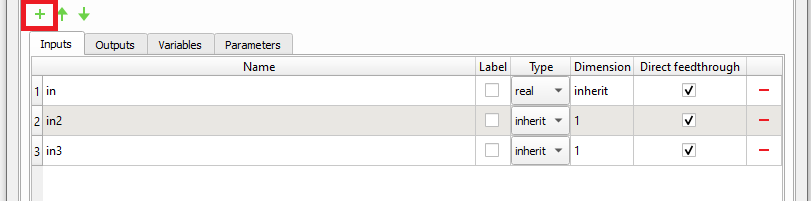
To add a new terminal to the C Function component, simply click the green plus-sign button for adding a new element to the table (Figure 2).
Terminal name
Every terminal on the component must have a unique name. When a new terminal is added, its name is set automatically. To rename the terminal, double-click the name you want to change and type in a new name.
When naming a terminal, it is important to follow these two rules:
- the Name column cannot be empty;
- Name cannot contain spaces.
Type
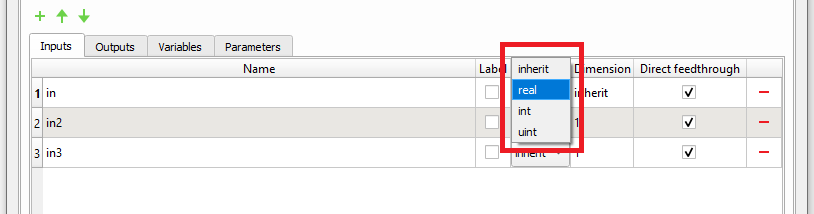
You can use the Type column to define the terminal’s signal type. The signal type can be set to the following four values (Figure 3):
- inherit,
- real,
- int, and
- uint.
The signal value type inherit has different meanings for input and output terminals.
If the signal type of an input terminal is set to inherit, then the terminal will inherit the signal type from the terminal that is connected to it.
If the signal type of an output terminal is set to inherit, then the signal type of the terminal will be determined by the internal rule.
The values real, int and uint are used to explicitly set a signal type to the terminal. If the signal type of the input terminal is set explicitly, only a terminal with the same signal type can be connected to it.
For further information about signal data types, please refer to the Signal types documentation.
Dimension
You can use the Dimension column to define the terminal’s signal dimension. The signal dimension can be either inherit or an integer number (e.g., 1). Similarly to the signal value type, the signal value dimension inherit has different meanings for input and output terminals.
If the signal dimension of an input terminal is set to inherit, then the terminal will inherit the signal dimension from the terminal that is connected to it.
If the signal dimension of an output terminal is set to inherit, then the terminal will inherit the signal dimension from an input terminal with the largest signal dimension.
Direct feedthrough
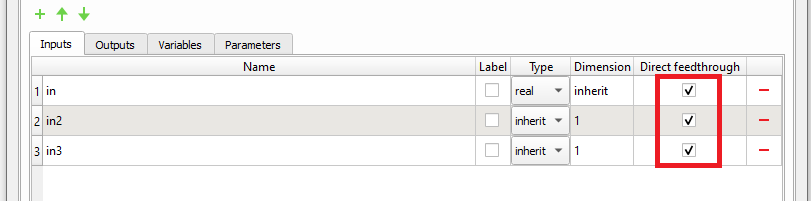
The Direct feedthrough column (Figure 4) contains a checkbox which determines whether the terminal is a direct feedthrough terminal or not.
If a terminal is defined as direct feedthrough, it means that its current value determines the current value of one of the component's outputs.
Depending if the input and/or output terminals are set as direct feedthrough or not, certain rules should be followed when writing C code to ensure the compilation passes and simulation results are valid. For these rules, please see Rules for writing C code.
For further information about direct feedthrough terminals, please refer to the Component Sorting and Algebraic loops documentation.
Terminal removal
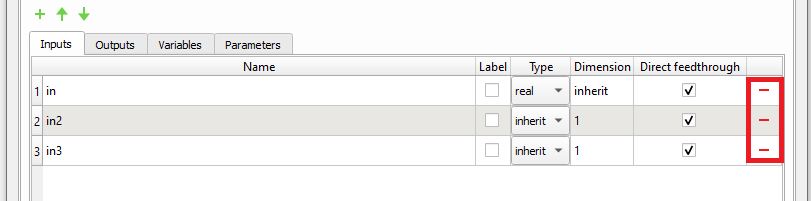
To remove a terminal, simply click the red minus-sign button (Figure 5) in the row of the terminal you want to remove and then click OK.
Terminal reordering
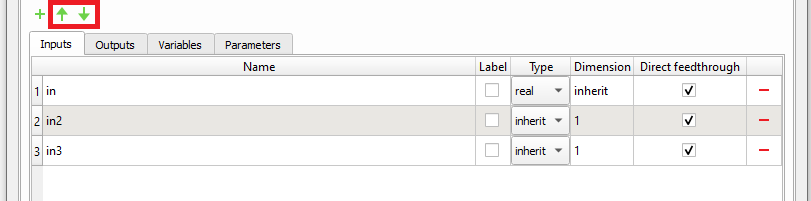
To reorder terminals, first select rows of terminals you want to move and then simply click either the up-arrow-sign or the down-arrow-sign.
Global variables
Global variables are accessible from every component’s function (Figure 7 and Figure 12). Values of global variables are preserved among different function calls.
Variable name
Terminal naming rules defined in section Terminal name must be also applied for naming global variables.
Variable type
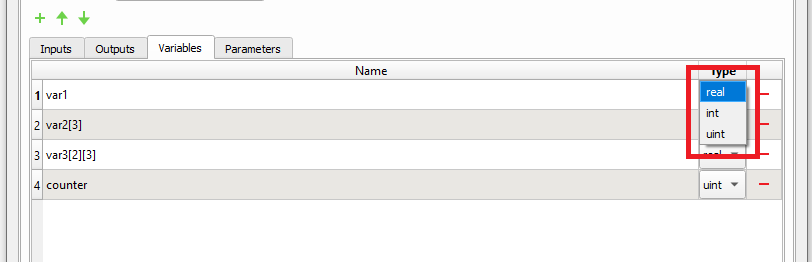
You can use the Type column to define a global variable’s signal type. The signal type can be set to (Figure 7): real, int and uint.
For more information about signal data types, please take a look at the Signal types documentation.
Vectors and matrices
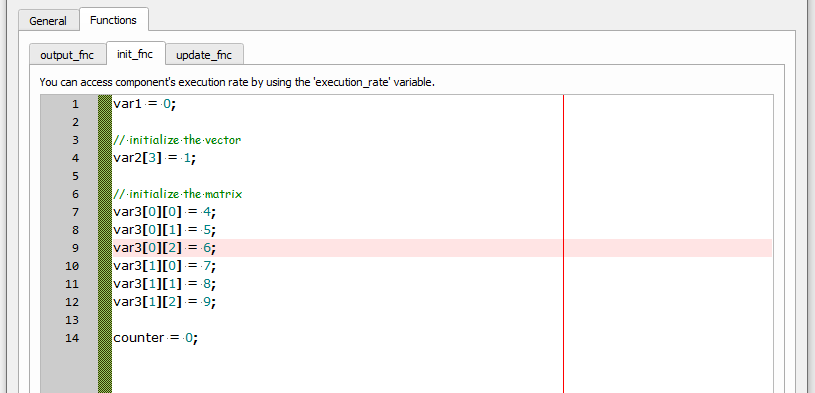
Global variables can also be defined as a vectors and matrices. A size of a vector or a matrix must be defined statically, as shown in Figure 7 for var2 and var3 variables.
Variable removal
Variables are removed in the same way as the terminals (please, see the section Terminal removal).
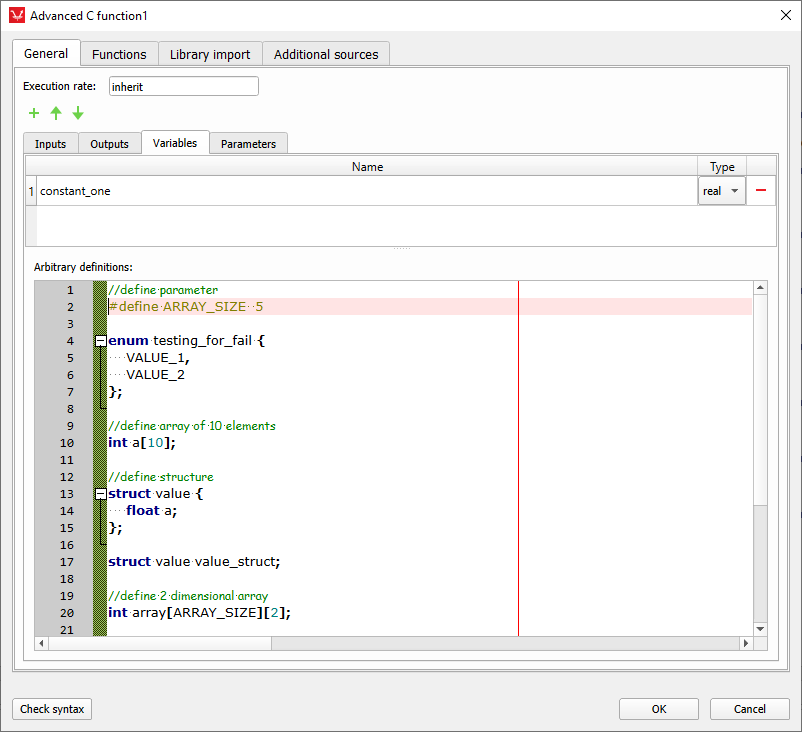
Arbitrary definitions
This section allows arbitrary definitions of variables which are supported by C language. Figure 8 shows the user interface of the General tab with the Arbitrary definitions section.
Parameters
Parameters allow you to pass external variables into the C function component. These external variables are propagated through the namespace into the C function.
To make an external variable visible within the C function component, you must declare it inside the parameters table (Figure 7), otherwise an error will be raised (Figure 9).
Parameters can be accessed inside the component’s functions in the same way as the global variables are accessed.

Parameter name
Terminal naming rules defined previously in the "Terminal name" section must also be applied.
Parameter type
You can use the Type column to define a parameter’s signal type. The signal type can be set to: real, int and uint.
For further information about signal data types, please refer to the Signal types documentation.
Parameter removal
Variables are removed in the same way as the terminals (please, see the section Inputs and outputs).
Using Python iterables to initialize C arrays
If a parameter is defined as a Python iterable (list, set, or tuple), it will be automatically converted into a C array initializer. For example, param1 = [1, 2 , 3] will be converted into {1, 2, 3}.
Functions
The Functions tab allows you to define arbitrary init, output and update functions.
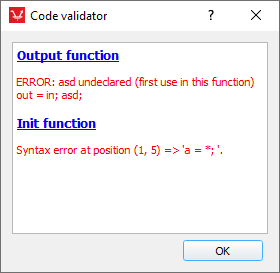
Once you implement the functions, you can check if the code is syntactically correct by pressing the Check syntax button (Figure 10).

If the code is syntactically correct, you will get the No errors found message, otherwise the Code validator dialog will be shown (Figure 11). Every error message inside the Code validator dialog has a header and content. If you click on the header, you will be automatically redirected to the function that caused an error.
C function has built-in support for mathematical functions and constants from the standard math.h library
Rules for writing C code
There are certain rules that need to be followed when writing C code:
- Inputs and outputs should not be initialized in the init_fnc.
- Every variable that holds its value from iteration to iteration must be defined as state. Output cannot save its value from iteration to iteration.
- If input is not direct feedthrough, it cannot be used directly in output_fnc.
- If output is not feedthrough, then it cannot be calculated in output_fnc. In this case, output must be calculated in update_fnc. This type of output behaves as a state variable. We can use the output value in output_fnc, but we cannot assign a value to it.
- If output is feedthrough, its value must be calculated in output_fnc.
- Terminal feedthrough on the component must be set according to the C code.
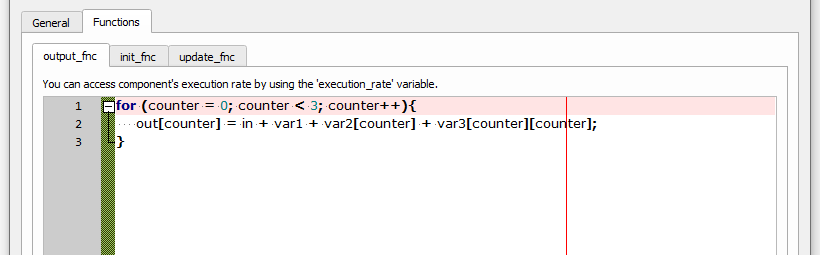
Output function (output_fnc)
The output_fnc function is used to update the output signals of the component and is called at each simulation step.
Example of output_fnc function
Example of accessing global variables in init_fnc function
Init function (init_fnc)
The init_fnc function is used to initialize component state variables and is called at the beginning of a simulation, before the first simulation step.
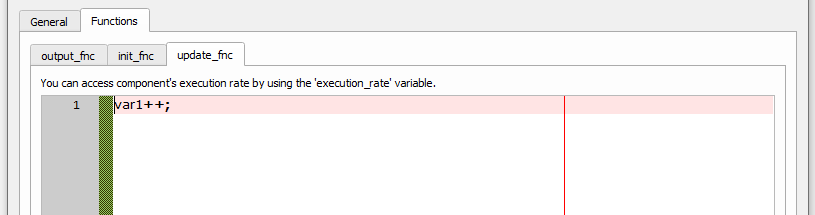
Update function (update_fnc)
The update_fnc function is used to update the state variables of the component and is called at each simulation step after the output_fnc function.
Library import tab
In cases when the vendor wants to hide the details of controller algorithm implementation, some kind of pre-compiled library is shared with the end user. Typically, these libraries come in form of a Dynamic-link library (.dll) for Windows operating systems, Shared Object (.so) for Linux operating systems, or Archive Libraries (.a) for some proprietary architectures.
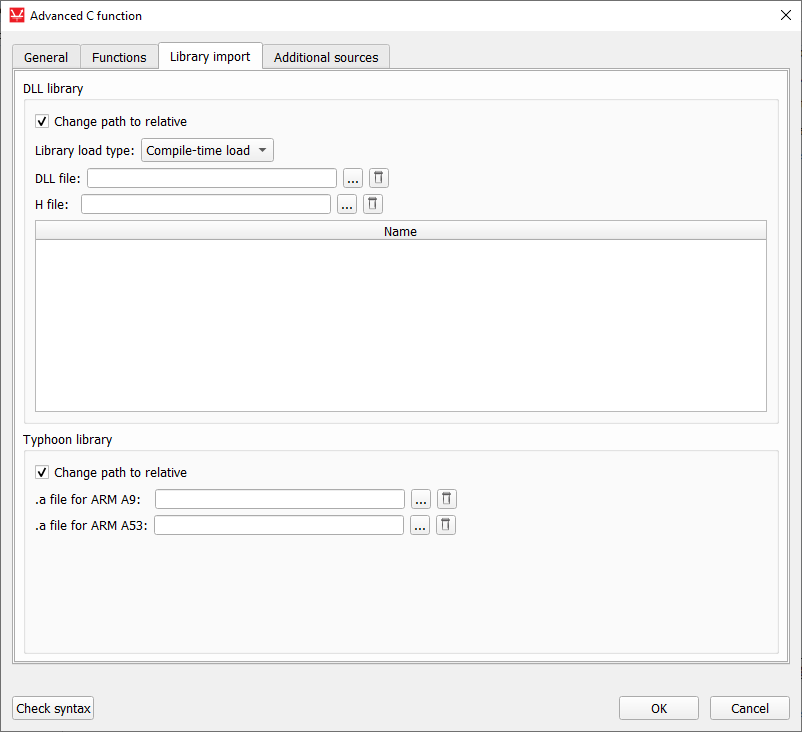
The Library import tab allows you to import these library files.
DLL/SO libraries
In addition to C functions, the Library import tab allows Shared Library (.dll for Windows or .so for Linux) and header files to be imported. The header file which corresponds to a Shared Library file, must contain function prototypes which are in the Shared Library (it can be subset of functions from the Shared Library). The header file for the Shared Library must not contain functions that are not in the Shared Library. You can remove an import simply by clicking the brush icon near the Shared Library and header file path. The choice of path (relative or absolute) is saved upon model save: this is very important when you move a compiled model to another location. The DLL/SO functions tab shows the user interface of the Library import tab.
- Compile-time load - the library will be linked statically during the compilation of the VHIL application (legacy).
- Run-time load - the library will be loaded when the simulation starts. The main advantage of this load type is that you can modify the function implementation in the Shared Library and apply the changes without the need to recompile the model. To apply the changes just stop the simulation, recompile the Shared Library, and rerun the simulation.
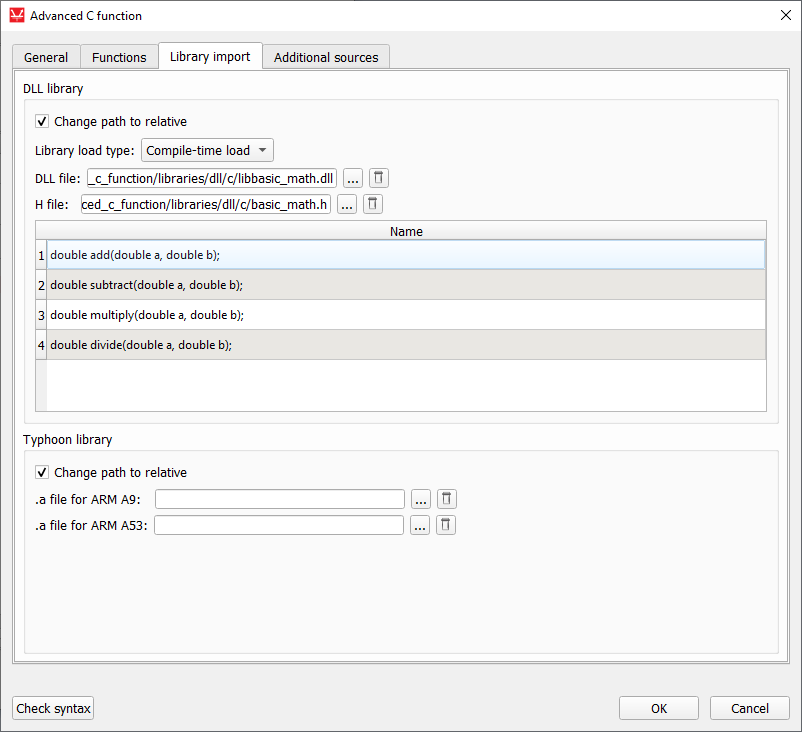
Functions will appear as in Figure 16 on successful import of a DLL and the header file.
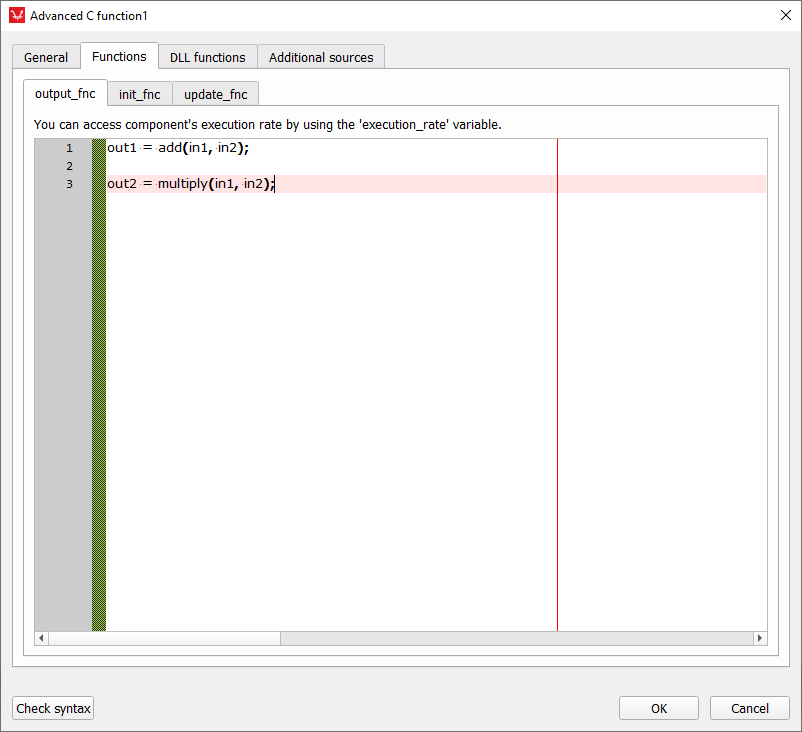
By simply copying the function prototype, you can call DLL functions inside the Functions tab. Figure 17 shows an example.
Typhoon library
Typhoon library just indicates that the archive library (.a) file is appropriate for Typhoon HIL devices. This means that the source files are compiled for ARM A9 and/or ARM A53 processors that are used by HIL devices.
The use of library (.a) files is convenient when you want to hide the implementation details of the controller algorithm, but still want to run the simulation in real time on a HIL device.
Since HIL devices use the ARM A9 or ARM A53 processor architectures, dedicated C code compilers must be used to compile the source code. These compilers are available in every Typhoon HIL software installation and are accessible for use.
- Windows
- ARM A9
- <installation folder>/compilers/windows/z7/gnu/arm/nt/bin/arm-xilinx-eabi-gcc
- <installation folder>/compilers/windows/z7/gnu/arm/nt/bin/arm-xilinx-eabi-ar
- ARM A53 (Windows):
- <installation folder>/compilers/windows/zu/gnu/aarch64/nt/aarch64-none/bin/aarch64-none-elf-gcc
- <installation folder>/compilers/windows/zu/gnu/aarch64/nt/aarch64-none/bin/aarch64-none-elf-ar
- ARM A9
- Linux
- ARM A9:
- <installation folder>/compilers/linux/z7/gnu/arm/lin/bin/arm-xilinx-eabi-gcc
- <installation folder>/compilers/linux/z7/gnu/arm/lin/bin/arm-xilinx-eabi-ar
- ARM A53:
- <installation folder>/compilers/windows/zu/gnu/aarch64/lin/aarch64-none/bin/aarch64-none-elf-gcc
- <installation folder>/compilers/windows/zu/gnu/aarch64/lin/aarch64-none/bin/aarch64-none-elf-ar
- ARM A9:
- Compile all the source code files (.c) to object files (.o) using the ARM compiler
- Combine all the object files (.o) in one library (.a) file using the ARM archiver
An example on how to generate a library file will be explained using simple source files and appropriate header files. The code extract is:
<math_functions.h>
       #ifndef _MATH_FUNCTIONS_
       #define _MATH_FUNCTIONS_
       double sum(double, double);
       double sub(double, double);
       #endif

       <increment.h>
       #ifndef _INCREMENT_
       #define _INCREMENT_
       double increment(double);
       #endif

       <sum.c>
       #include "math_functions.h"
       double sum(double a, double b) {
       return a + b;
       }

       <sub.c>
       #include "math_functions.h"
       double sub(double a, double b) {
       return a - b;
       }

       <increment.c>
       #include "increment.h"
       double increment(double a) {
       return a + 1;
       }
This link provides an explanation on how to generate a library file. For this example, commands for generating the .a file for ARM A53 are:
aarch64-none-elf-gcc -Iinclude -c src\increment.c -o src\increment.o
       aarch64-none-elf-gcc -Iinclude -c src\sub.c -o src\sub.o
       aarch64-none-elf-gcc -Iinclude -c src\sum.c -o src\sum.o
       aarch64-none-elf-ar rcs libexample_a53.a src\increment.o src\sub.o src\sum.o
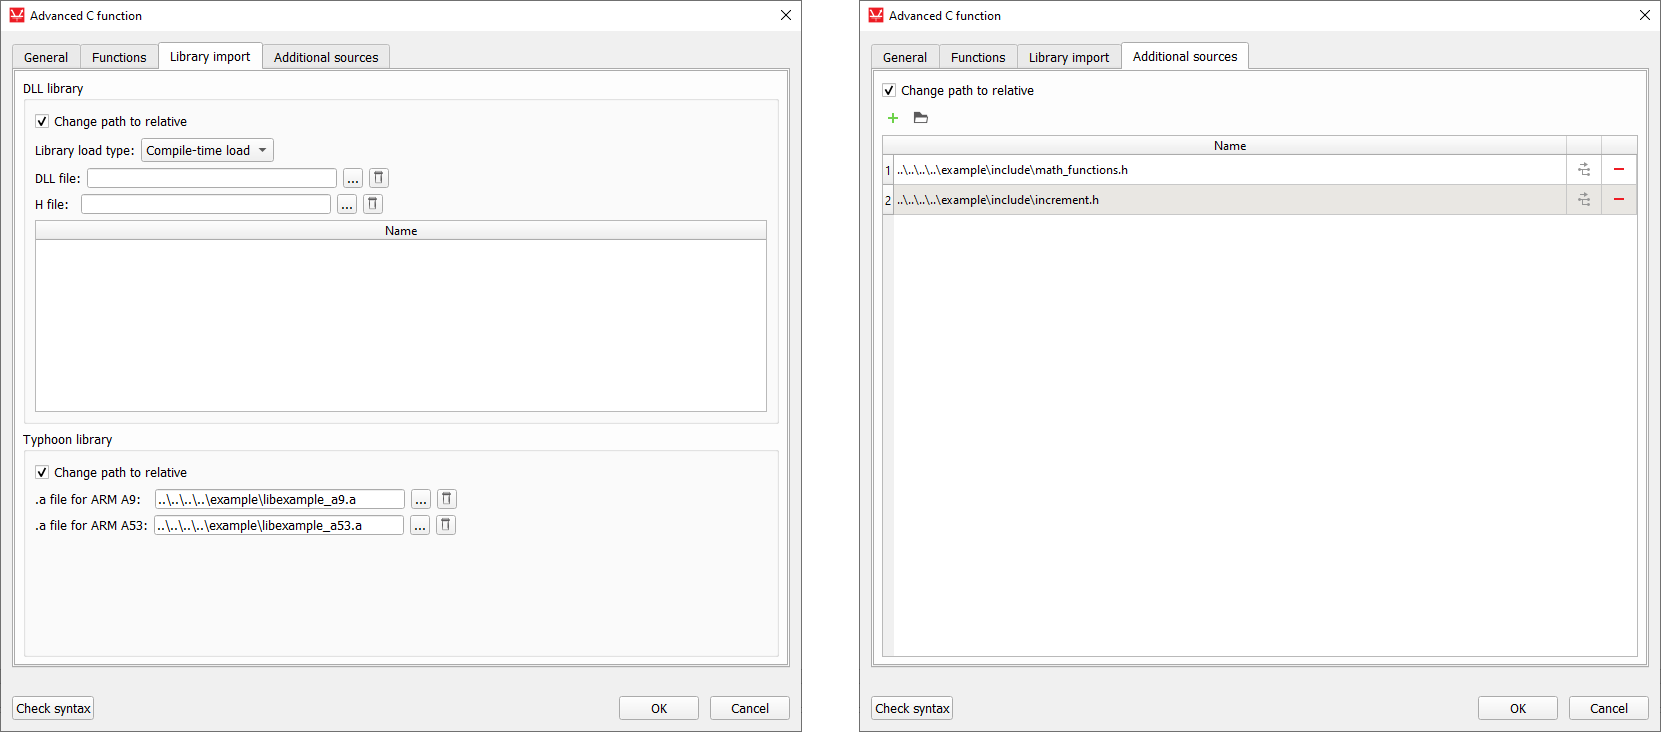
After obtaining the library files, it is a simple matter of importing them, as well as the header files. This is shown in Figure 18.
There is a slight difference when importing the header files compared to the DLL/SO libraries. There is no dedicated field for it, but rather, the headers are imported through the Additional sources tab, as in Additional sources tab.
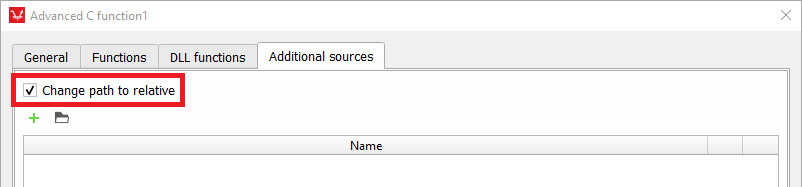
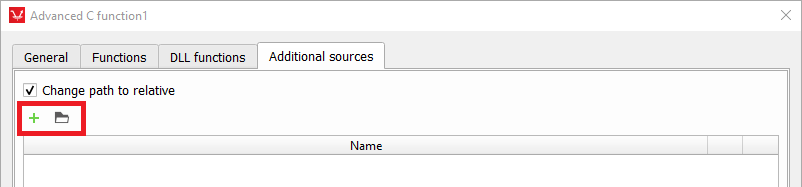
Additional sources tab
This tab, in addition to a C function, allows C and C++ language source files (*.c, *.cpp and *.h) to be imported. Figure 19 shows the user interface of the Additional sources tab.


Every C source file must have its own header file, which must be imported also. You can make one header file for all imported C files and import only that header file. By simply copying the function prototype from the imported header file(s), you can call functions inside the Functions tab. Figure 17 shows an example.
The C function component is supported by all HIL Devices and VHIL.
