Triggers
Overview of triggers, which run Typhoon Test Hub jobs according to predefined conditions.
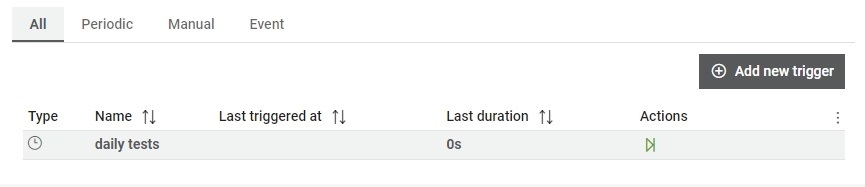
Defining when a Job should be executed is at the core of Test Automation, as this maintains a consistent order of Executions in the Queue. In Typhoon Test Hub, it is possible to create Manual, Periodic, or Event Triggers. They all have the same behavior but differ in the way they are started. You can see the most important information about triggers in the Triggers table. Here you can create a new trigger, update a trigger, or delete am existing one. Triggers can be one of the following types:
- Periodic - initiates the job execution at scheduled intervals or times
- Manual - enables users to initiate the execution of a job manually
- Event - responds to a specific event or condition in a system, triggering the execution of a job when a predefined event occurs
The triggers table shows the following information:
- Type:
- Periodic
 -
Periodic Triggers run at a pre-defined interval – every day at 10pm, for
example.
-
Periodic Triggers run at a pre-defined interval – every day at 10pm, for
example. - Manual
 -
Manual Triggers are mostly used for quick and customized test executions.
These triggers must be started manually.
-
Manual Triggers are mostly used for quick and customized test executions.
These triggers must be started manually. - Event
 -
Event Triggers are the most flexible and allow integration with several
other applications. Event Triggers create a trigger URL, which is used to
start the execution externally. When an Event Trigger starts, it returns its
Execution ID, which can be used to track if the execution is Queued,
Running, Passed, or Failed. This information can be used to approve merge
requests, for example. Here is a simple Python code snippet showing how you
can trigger an Execution with parameters (all parameters must be set when
doing so), wait for it to be done, and raise an exception in case it fails.
If trigger has parameter that was created as parametrized field of either Job or
Pipeline, those parameters are to be passed using the following naming:
TTH_PARAMETER_AGENT, TTH_PARAMETER_SETUP, TTH_PARAMETER_TAG, all three available
for Jobs and only TTH_PARAMETER_TAG available for Pipelines. Value of mentioned
fields can be entered as following:
-
Event Triggers are the most flexible and allow integration with several
other applications. Event Triggers create a trigger URL, which is used to
start the execution externally. When an Event Trigger starts, it returns its
Execution ID, which can be used to track if the execution is Queued,
Running, Passed, or Failed. This information can be used to approve merge
requests, for example. Here is a simple Python code snippet showing how you
can trigger an Execution with parameters (all parameters must be set when
doing so), wait for it to be done, and raise an exception in case it fails.
If trigger has parameter that was created as parametrized field of either Job or
Pipeline, those parameters are to be passed using the following naming:
TTH_PARAMETER_AGENT, TTH_PARAMETER_SETUP, TTH_PARAMETER_TAG, all three available
for Jobs and only TTH_PARAMETER_TAG available for Pipelines. Value of mentioned
fields can be entered as following:
- TTH_PARAMETER_AGENT=1
- TTH_PARAMETER_AGENT=[1]
- TTH_PARAMETER_AGENT=[1, 2]
In the page Start event trigger you can read more about starting event trigger.
- Periodic
- Name of trigger
- Last time when a job was triggered by this trigger
- Last duration of an execution made by this trigger
In the Actions column, you can also manually start and stop specific triggers.
 button, columns of the table
can be customized - hidden or shown depending on the preference. Columns of the table
can be reordered by using drag and drop in the table header. When positioning cursor in
between two columns, cursor for column resizing will show and enable change of the
column's width. All changes made to the table will be automatically preserved.
button, columns of the table
can be customized - hidden or shown depending on the preference. Columns of the table
can be reordered by using drag and drop in the table header. When positioning cursor in
between two columns, cursor for column resizing will show and enable change of the
column's width. All changes made to the table will be automatically preserved. Trigger details
In the Details section, you can find:
- Configuration tab: Here you can update the trigger data.
- Executions tab: Contains triggered executions by the selected trigger.
- Reports tab: Contains reports generated by the selected trigger.
You can also delete a trigger by clicking
on the  button.
A trigger can be deleted only when there is no queued execution made by this trigger.
button.
A trigger can be deleted only when there is no queued execution made by this trigger.
Create trigger
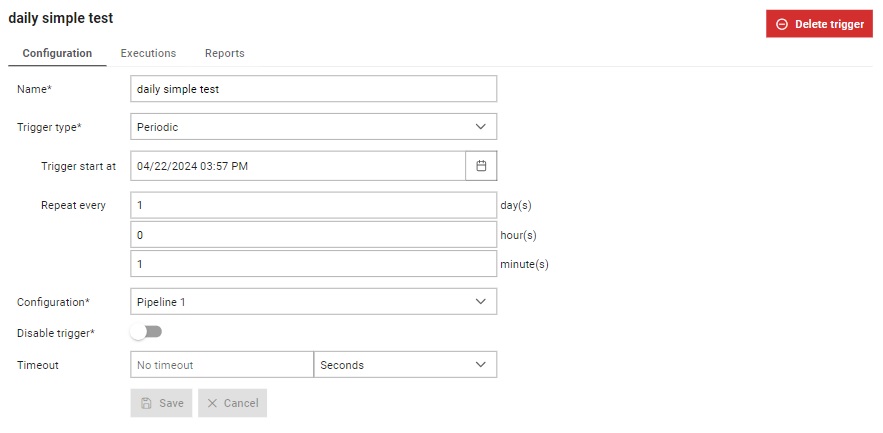
A new trigger can be added by clicking on the  button. This opens the
Add new trigger dialog shown in Figure 3.
button. This opens the
Add new trigger dialog shown in Figure 3.

- Give a trigger a name, which will be used to refer to it throughout Typhoon Test Hub. Each name must be unique.
- Select a trigger type and fill in the needed data.
- Select a configuration (Job or Pipeline) you want to be triggered and assign parameter values if the configuration has parameters. Parameters will be listed under the configuration field with their names bolded.
- Select Agent that will be used for the execution.
- Select the timeout - the maximum allowed time for the execution of a job after the trigger is activated. This ensures that the execution completes within a defined time frame or is automatically terminated.
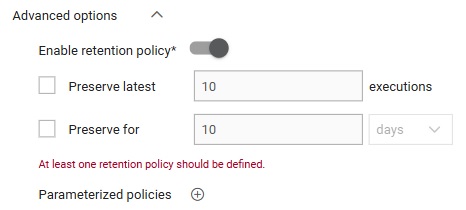
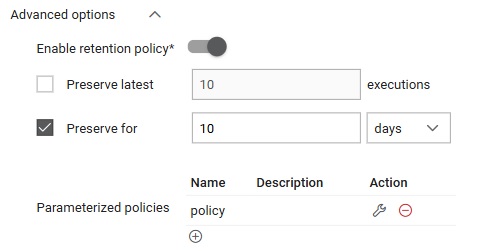
- Preserve latest - where number of executions that would be preserved needs to be entered.
- Preserve for - where period needs to be entered (number and unit, where unit can be days/weeks/months/years) for which executions needs to be preserved.