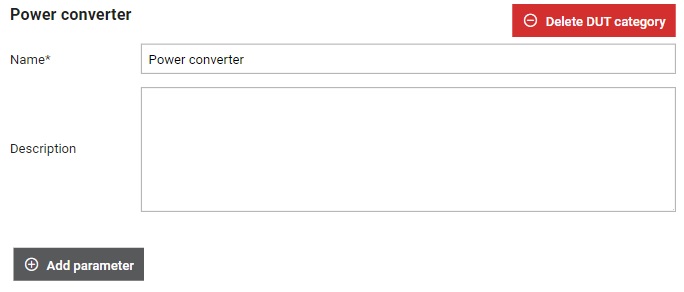
DUT categories
Allows creating categories for Devices Under Test.
From the DUT categories table you can see information about the existing categories. It also makes it possible to add information about the DUT category. This information is displayed in the DUT category Table (Figure 1).

 button, columns of the table
can be customized - hidden or shown depending on the preference. Columns of the table
can be reordered by using drag and drop in the table header. When positioning cursor in
between two columns, cursor for column resizing will show and enable change of the
column's width. All changes made to the table will be automatically preserved.
button, columns of the table
can be customized - hidden or shown depending on the preference. Columns of the table
can be reordered by using drag and drop in the table header. When positioning cursor in
between two columns, cursor for column resizing will show and enable change of the
column's width. All changes made to the table will be automatically preserved. DUT category details
Displays general DUT category information.
Manage DUT category parameters
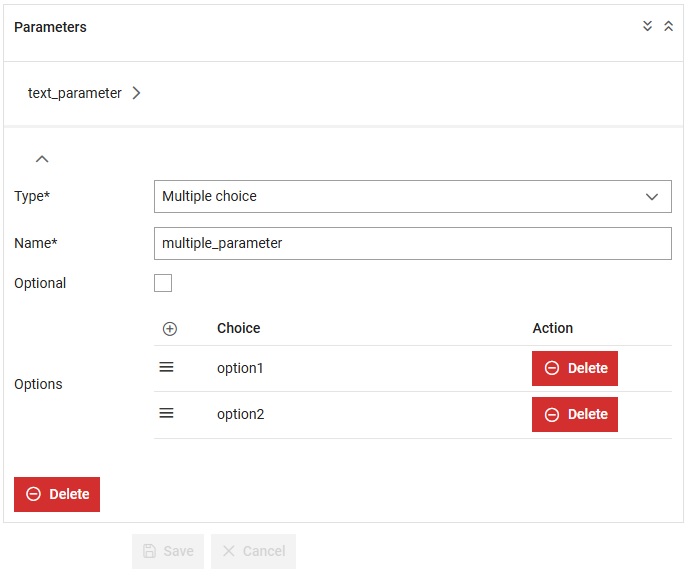
- A parameter can be added by clicking on the
 button. This opens a form similar to the one shown in Figure 1.
 - Each parameter can be removed by
clicking on the
 button.
 - Every parameter can be collapsed by clicking on the arrow up button (
 ). When any of the parameters is collapsed,
its name will be presented on the collapsed view. On the collapsed view,
clicking on the arrow right button (
). When any of the parameters is collapsed,
its name will be presented on the collapsed view. On the collapsed view,
clicking on the arrow right button ( ) will
expand the parameter.
) will
expand the parameter. - All parameters can be collapsed at once by clicking on the double up arrow button (
 ) in the top right corner of the parameters list.
 - All parameters can be expanded at once by clicking on the double down arrow button (
 ) in the top right corner of the parameters list.
 - Parameters in the list can be reordered by using drag and drop.
Parameter types
There are 3 types of parameters: Choice, Multiple choice, and Text.
- Choice: When the checkbox is checked, the value is 'true', when unchecked the value is 'false'
-
Single choice: Select the option from the given dropdown menu. The available options must be defined during parameter creation, with at least two options provided
-
Multiple choice: Select one or more options from the given menu. The available options must be defined during parameter creation, with at least two options provided. Delimiter must be defined, and is used to connect selected options into a single value that is used when job is started.
-
Text: Enter the desired text or value in the text field.
- Name: which must be unique
- Optional: when checked makes a parameter optional, meaning it doesn't need to have a default value (it can be left blank). If this option is marked for a multiple choice parameter an empty option will be added. Note that empty will be passed as the parameter value when using it.
- Default value: initial value which will be used as the default value when using a Parameter. It is mandatory if the Parameter is not marked as optional. When creating a multiple choice parameter, the first option listed will be automatically set as the default value (the Default value field will not appear).
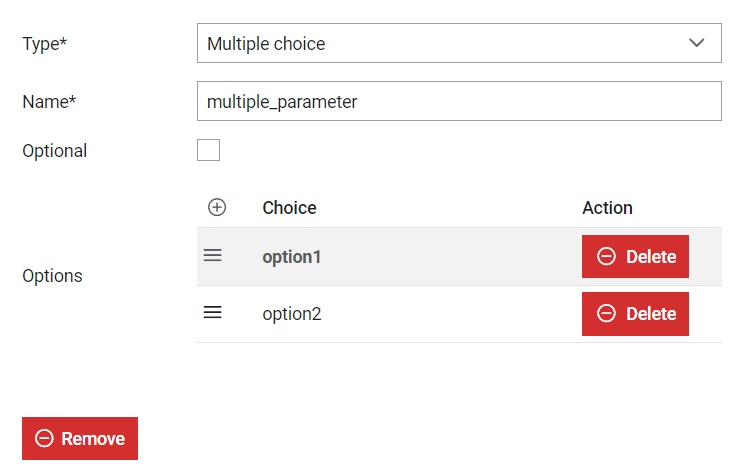
For a multiple choice parameter, options can be added by clicking on the add option button
(![]() ). Every option can be
edited by clicking on the option name and options can be removed by clicking on the
button.
). Every option can be
edited by clicking on the option name and options can be removed by clicking on the
button.