The Users table (Figure 1) shows the following information:
First name
Last name
Username
Email
Roles
Additionally, specific users can be blocked by clicking on the button in the table.
Admin users can unblock a user by clicking on the button. Admin users can block users with
developer, guest and custom roles. Currently logged in user can access his
profile page where he can edit his information by clicking on the
button.
Note: By clicking on the button, columns of the table
can be customized - hidden or shown depending on the preference. Columns of the table
can be reordered by using drag and drop in the table header. When positioning cursor in
between two columns, cursor for column resizing will show and enable change of the
column's width. All changes made to the table will be automatically preserved.
Note: By inserting text in the Search input field, the table rows
are filtered. Filtering is done based on the textual content of the table cells. By
clicking on the button,
the Search input field is cleared and filtering is cancelled.
User details
Figure 2. User details
In the Details section, admin users can manage data about a selected user.
When a new user is added, the default picture is Typhoon HIL's logo.
Additionally, admins can delete a user by clicking on the button. All resources
that were reserved by the deleted user will be freed.
Note: Please note that if a user is deleted, their username will not be available for future use.
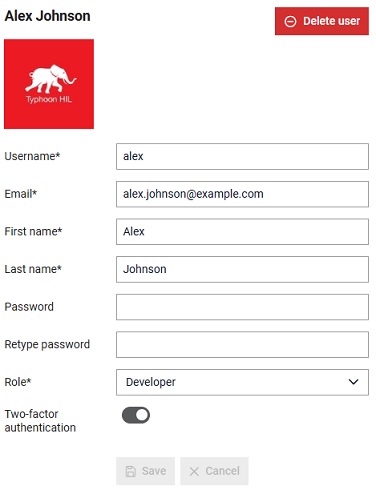
If a user enables two-factor authentication but does not setup the
authentication via the authenticator application properly, there is a chance they
may be locked out of the system. In such cases, admins can disable two-factor
authentication for the user's profile, allowing them to sign in using their existing
credentials (username and password) without needing the two-factor autentication.
This scenario is shown in the figure below. Figure 3. User details with two-factor authentication enabled for the selected
user
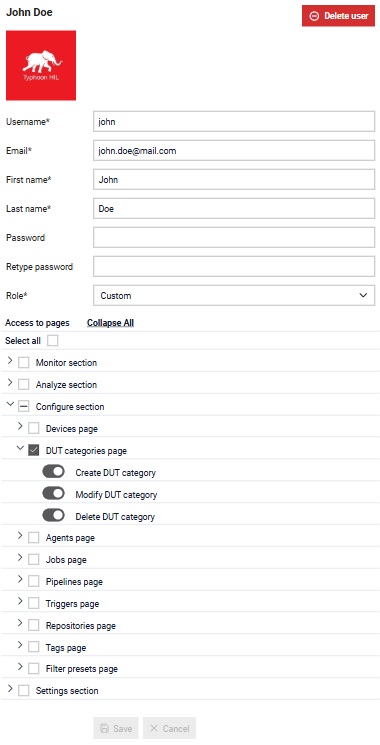
Custom role definition
If a user's role is set to Custom, the options for defining permissions will
be displayed in the detailed view for that user. Access to pages can be granted by
checking the appropriate checkboxes. In the figure below, the user was granted
permission to access the DUT categories page. By checking the DUT categories
page checkbox, the user was automatically granted access to the API
functions that enable the creatation, modification and deletion of DUT categories.
If the user does not need access to any of these API functions, those options can be
disabled. Users can also be granted access only to the API functions without access
to the page. All options can be selected by checking the Select all option in
the header section, which will automatically toggle access to their inner API
functions. Once all checkboxes are selected they can be cleared by clicking the
option Clear all which will appear once all checkboxes are checked. When
user-created role is selected, permissions can be modifiedd, which triggers
automatic role change to Custom.
Note: Please note that once a user's permissions are
modified, they will need to log out and log back in for the new permissions to
take effect.
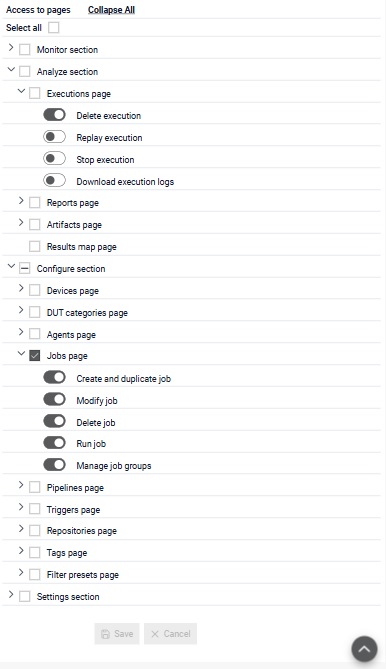
Figure 4. Custom role definition If a user is granted permission to the Jobs page, they will be able to
see the executions of the selected Job, but they won't be able to delete or modify
those executions in any way. To enable those actions, the user must be granted
access to the relevant API functions. In the figure below, we can see that the user
has been granted access to the Jobs page, as well as permission to delete
executions. This ensures that the user can delete the execution of a specific Job
from the Jobs page. Figure 5. Custom role definition
Create user
A new user can be added by
clicking on the
button.
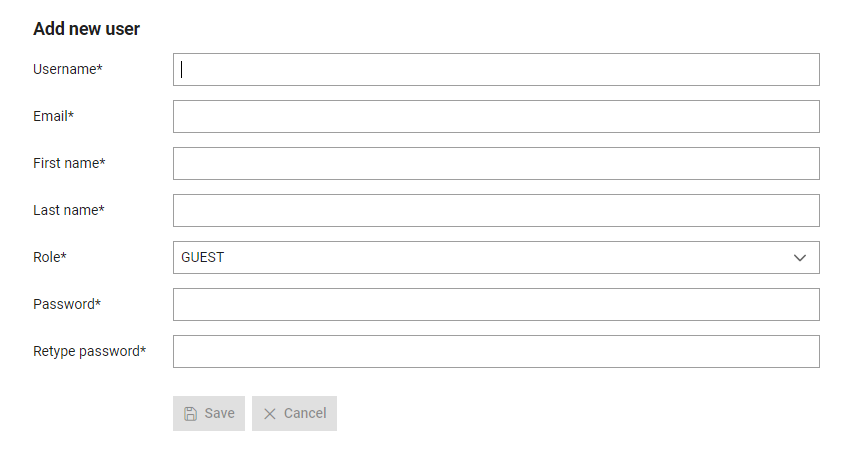
Figure 6. Add new user
When an admin adds a new user, he needs to fill out the form in Figure 6. This requires the following actions:
Assign a username which will be used to refer to the user throughout the Typhoon
Test Hub. Each username must be unique.
Enter a email
First name
Last name
Select a role
Create a password and retype it
Note: In order to save a form, all input fields must be valid. Required fields are signed
with *.

 button in the table.
Admin users can unblock a user by clicking on the
button in the table.
Admin users can unblock a user by clicking on the  button. Admin users can block users with
developer, guest and custom roles. Currently logged in user can access his
profile page where he can edit his information by clicking on the
button. Admin users can block users with
developer, guest and custom roles. Currently logged in user can access his
profile page where he can edit his information by clicking on the
 button.
 button, columns of the table
can be customized - hidden or shown depending on the preference. Columns of the table
can be reordered by using drag and drop in the table header. When positioning cursor in
between two columns, cursor for column resizing will show and enable change of the
column's width. All changes made to the table will be automatically preserved.
button, columns of the table
can be customized - hidden or shown depending on the preference. Columns of the table
can be reordered by using drag and drop in the table header. When positioning cursor in
between two columns, cursor for column resizing will show and enable change of the
column's width. All changes made to the table will be automatically preserved. 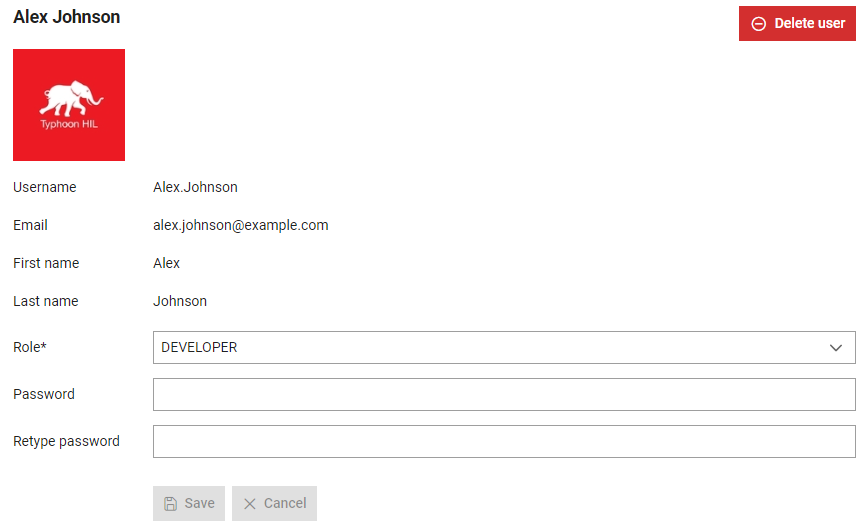
 button. All resources
that were reserved by the deleted user will be freed.
button. All resources
that were reserved by the deleted user will be freed.
 button.